
The first week after your new shower goes in decides how it looks in year five. Not the tile you picked, not the glass thickness, not the price you paid. The first week.
Your glass has never met hard water. Your grout has never been sealed. Your silicone is still curing. Every surface in that room is in a condition it will never be in again, and almost everything that goes wrong with a shower over the next decade starts with something done or skipped in these few days. Then the crew leaves, nobody hands you instructions, and you find out the hard way. This guide is the instructions.

Written with Clare Boland, Designer, Columbia
Reviewed by Emin Halac, CEO · Last updated August 2026

Where are you right now?
- The crew left today. Do not clean anything yet. Go to Wait before you clean anything.
- The tile looks cloudy or dull. That is probably grout haze, not water spots. Go to Grout haze is not hard water.
- There is rubbery residue on the glass. Mechanical removal first, solvents almost never. Go to Silicone smears on new glass.
- Everything looks fine and you want it to stay that way. You are in the best position of anyone reading this. Go to The coating window.
- Your shower is already cloudy and cleaning stopped working. Different problem, different article: how to clean glass shower doors.
The numbers that matter this week
24 hrs
Full silicone cure, and how long GE says not to touch or clean the bead
24 to 48
Hours before you can use the shower after grouting, per MAPEI’s own answer
10 days
Minimum grout cure before an acidic haze remover is safe to use
48 to 72
Hours after grouting before sealer goes on, so moisture does not dilute it
Day 3 to 7
When the glass gets its real first clean, once most airborne dust has landed
30 sec
A squeegee pass after each shower, which beats every product on this page
Still planning the remodel?
The easiest way to avoid all of this is to decide about coated glass and grout type before anything gets ordered. We will walk through both with you.

The first 90 days, in order
Almost everything written about new showers is a pile of loose tips. Wipe this, avoid that, buy this spray. What nobody publishes is the order, and the order is the part that matters. Doing the right thing at the wrong time is how people ruin new grout.
Here is the whole sequence on one screen. Every step gets its own section below.
| When | What you do | Why the timing |
|---|---|---|
| Day 0, crew leaves | Nothing wet. Take photos. Ask the questions in the last section before anyone drives away. | Silicone is still curing and fresh grout is still hardening. |
| Day 0 to 1 | Dry dust removal only. Vacuum, then a dry microfibre. No sprays. | Grit plus liquid plus pressure is how you scratch brand-new glass. |
| Day 1 | Light haze comes off with a wrung-out sponge or cheesecloth. Non-acid haze remover if needed. | Custom Building Products allows a non-acid cleanup after 24 hours. |
| 24 to 48 hrs | First shower. Confirm against your own products. | MAPEI’s published figure for cement grout. Silicone full cure is 24 hours, so 48 clears both. |
| Day 2 to 3 | Grout sealer goes on, if your grout needs sealing. | 48 to 72 hours so residual moisture does not dilute the sealer. |
| After sealing | Keep it dry for another 12 to 24 hours. | Aqua Mix sealers specify 12 hours, or 24 for the fast-track version. |
| Day 3 to 7 | The real cleaning day. Glass gets its proper first clean. | Most airborne dust has landed by now. |
| Day 3 to 7 | If you are adding an aftermarket coating, this is the window. | The glass is clean, dry, and has never had minerals dry on it. |
| Day 10 plus | Only now is an acidic haze remover an option, if haze survived. | Two Custom products require a 10-day minimum grout cure. |
| Day 21 | Routine cleaning of the grout can begin. | MAPEI puts full cure at 21 days and asks you to wait for it. |
| Day 1 to 90 | Squeegee after every single shower until nobody has to think about it. | You are building the habit while the glass is still perfect. |
Save the version below, or send it to whoever is going to be doing the cleaning.

One caveat before you use that table as gospel. Your timings depend on which products went into your shower, and there is real variation between them. A rapid-set grout and an epoxy grout behave differently. So do a 100% silicone and a siliconized latex. That is exactly why the last section of this guide is a list of questions to ask the person who installed it.
Wait before you clean anything
Search for when you can use a new shower and you will get answers between 24 and 72 hours, all of them confident, none of them agreeing, and all of them talking about grout. Grout is usually not the thing holding you up. Silicone is.
Every change of plane in your shower should be a flexible sealant rather than grout, and in a shower that usually means silicone. Wall to wall, wall to floor, wall to pan, around the glass. Those joints move, and grout cracks when it moves. This is not a preference, it is the industry position: the Tile Council of North America states that anywhere there is a change in substrate or backing surface, caulk should be used in place of grout because those surfaces move independently of each other, and that when grout is used instead it cracks and lets moisture through. Schlüter says the same thing from the system side, requiring movement joints at all changes in plane including floor to wall and wall to wall. So the joints most exposed to water are the ones still curing after the tile guys have packed up.
How long does grout need to cure?
MAPEI answers this one directly, and it is the clearest published answer we found anywhere. Asked how soon you can use a shower after grouting, their reply is five words: 24 to 48 hours.
Their grout data sheets say the same thing and add a detail almost nobody publishes. Keracolor grout instructs you to restrict use for 24 to 48 hours after grouting in residential showers and tub surrounds, and for 14 days in steam showers. If you built a steam shower, that is a different number and it is not close.
Here is the part that trips people up, because grout has several separate deadlines and they get blurred together.
| Milestone | When | What it means |
|---|---|---|
| Normal use | 24 to 48 hours | You can shower. This is the number most people are asking for |
| Steam shower use | 14 days | Steam is a different exposure entirely |
| Full cure | 21 days | The grout is fully cured. MAPEI protects the installation from water immersion until this point |
| Routine cleaning | 21 days | MAPEI says grout must be fully cured before regular cleaning starts |
Read that last row again, because it is the whole argument of this article in one line. You can use the shower in a couple of days. You should not start scrubbing it for three weeks. Those are not the same permission and treating them as one is how people damage grout they just paid for.
Different grouts carry different numbers, which is exactly why the questions at the end of this guide matter. MAPEI’s epoxy grout wants 10 to 14 days before water immersion or chemical exposure. Their premixed grout needs 72 hours before any moisture at all. Custom Building Products’ Prism grout says it can take intermittent water exposure after three days. Three different products, three different numbers, and only one of them describes what is in your shower.
Tack-free, water-ready and fully cured are three different things
This is where the confusion comes from, and it is worth understanding because the number printed on the front of the tube is always the shortest of the three.
Tack-free means the surface has skinned over and will not transfer to your finger. Water-ready means the manufacturer will stand behind water contact. Fully cured means the sealant has reached its final properties all the way through. They are not the same number and they do not even come in a consistent order. DAP’s 3.0 sealant is rated water-ready at 30 minutes and tack-free at two hours, and DAP says outright that the surface may still feel tacky when it is already safe to get wet.
| Product | Tack-free | Water-ready | Full cure |
|---|---|---|---|
| GE Advanced Silicone 2 Kitchen & Bath | 30 min | 30 min if conditions met, otherwise 8 hrs | 24 hrs |
| GE Supreme Silicone Kitchen & Bath | 30 min | 30 min if conditions met, otherwise 8 hrs | 24 hrs |
| DAP 100% Silicone Rubber Kitchen, Bath & Plumbing | 10 to 20 min | 12 hrs | 24 hrs |
| DAP 3.0 Advanced Kitchen & Bath | 2 hrs | 30 min | 24 hrs |
| Gorilla 100% Silicone Kitchen & Bath | Not published | 30 min if conditions met, otherwise 24 hrs | 24 hrs |
| DAP ALEX PLUS, acrylic latex plus silicone | 60 min | 24 hrs | Dries through in 7 to 14 days |
| SikaTile-885 Secure Silicone Caulk, hybrid polymer | 15 to 30 min | 72 hrs | 14 to 28 days |
Look at the two bold rows. DAP’s flagship 100% silicone for kitchens and baths asks for 12 hours before water, not 30 minutes. And Sika’s trade-channel tile caulk, which lists tubs and showers among its uses, says to allow a minimum of 72 hours at 70 degrees before putting the area into use. That is a spread of 30 minutes to three days across products that all look interchangeable on the label. If you have read somewhere that 100% silicone is always water-ready in half an hour, that is exactly why you need to know which tube your installer actually used.
Why your bathroom’s air matters, and why it cuts both ways
Silicone is a moisture-cure chemistry. It pulls water vapour out of the air to cure, which is why GE puts it plainly: silicone needs moisture in the air to cure, and low moisture slows it down. GE also gives the rate, roughly 2 to 3 mm of cured thickness per 24 hours in average conditions. That is the reason a thick bead in a cold, dry house in February takes considerably longer than the label suggests.
Now the part that catches people out. If your installer used an acrylic latex caulk rather than a silicone, humidity works the opposite way. Latex dries by evaporation, so DAP’s guidance for ALEX PLUS is that cooler temperatures and higher humidity slow it down. Two tubes that look nearly identical on the shelf respond to the same bathroom in opposite directions.
Clare’s tip
Run the bath fan for the first day. It is counterintuitive because you are not making steam yet, but a stagnant bathroom holds solvent vapour and construction dust, and a gentle air change helps everything settle and cure. Just do not point a space heater at fresh silicone to speed it up. Heat without moisture is the wrong half of the equation.
The one rule everyone agrees on
Do not touch or clean the sealant for 24 hours. GE says it, DAP says it, and the shower door manufacturers say the same thing from the other side. DreamLine’s manual instructs owners to allow 24 hours for the sealant to cure before the initial use of the shower. Kohler says allow the silicone sealant to cure for 24 hours before use.
So how do you square a 30-minute claim with a 24-hour instruction? They answer different questions. The sealant maker’s 30 minutes is a water-contact threshold under lab conditions. The shower door maker’s 24 hours is a put-it-back-in-service threshold for a whole assembly. If you want one number that clears the sealant and the grout together, use 48 hours. Nobody has ever regretted waiting an extra day.
And do not scrub a fresh bead while you are chasing haze off the tile above it. Wiping cleaner across an uncured joint drags sealant out of the corner and leaves a thin spot you will not notice until it fails.

Grout haze is not hard water
This is the single most expensive misunderstanding in the whole post-remodel window, and it is entirely understandable. You walk into a brand-new shower and the tile looks cloudy, dull, filmy. It looks exactly like the hard water scale you have spent years fighting in the old bathroom. So you reach for the descaler.
Wrong problem, wrong chemical, and on the wrong surface it does permanent damage. Kohler warns about this category of product directly, noting that grout and tile cleaners, scale removers, abrasive scourers and other powerful detergents can damage metallic, plated and plastic surfaces, including the shower base and the drain.
Grout haze is a thin film of cement left behind when the grout was cleaned up. It is the same material as the grout in your joints, spread microscopically thin across the face of the tile. Hard water scale is calcium and magnesium carbonate deposited by evaporating water. They look similar and they are not remotely the same thing.
| Tell | Grout haze | Hard water scale |
|---|---|---|
| Timing | Present before the shower has ever been used | Builds up over weeks and months of use |
| Where it is | Even across whole tile faces, often in wipe marks or footprints | Concentrated where water runs, pools and dries |
| The comparison test | Hold a spare uninstalled tile next to the wall. Haze shows up instantly | Not applicable, the tile was clean when installed |
| What removes it | Water and agitation first, then a purpose-made haze remover | A mild acid, which dissolves the carbonate |
| Wrong-chemical risk | Acid too early damages fresh grout and can etch stone | Alkaline cleaners barely touch it |
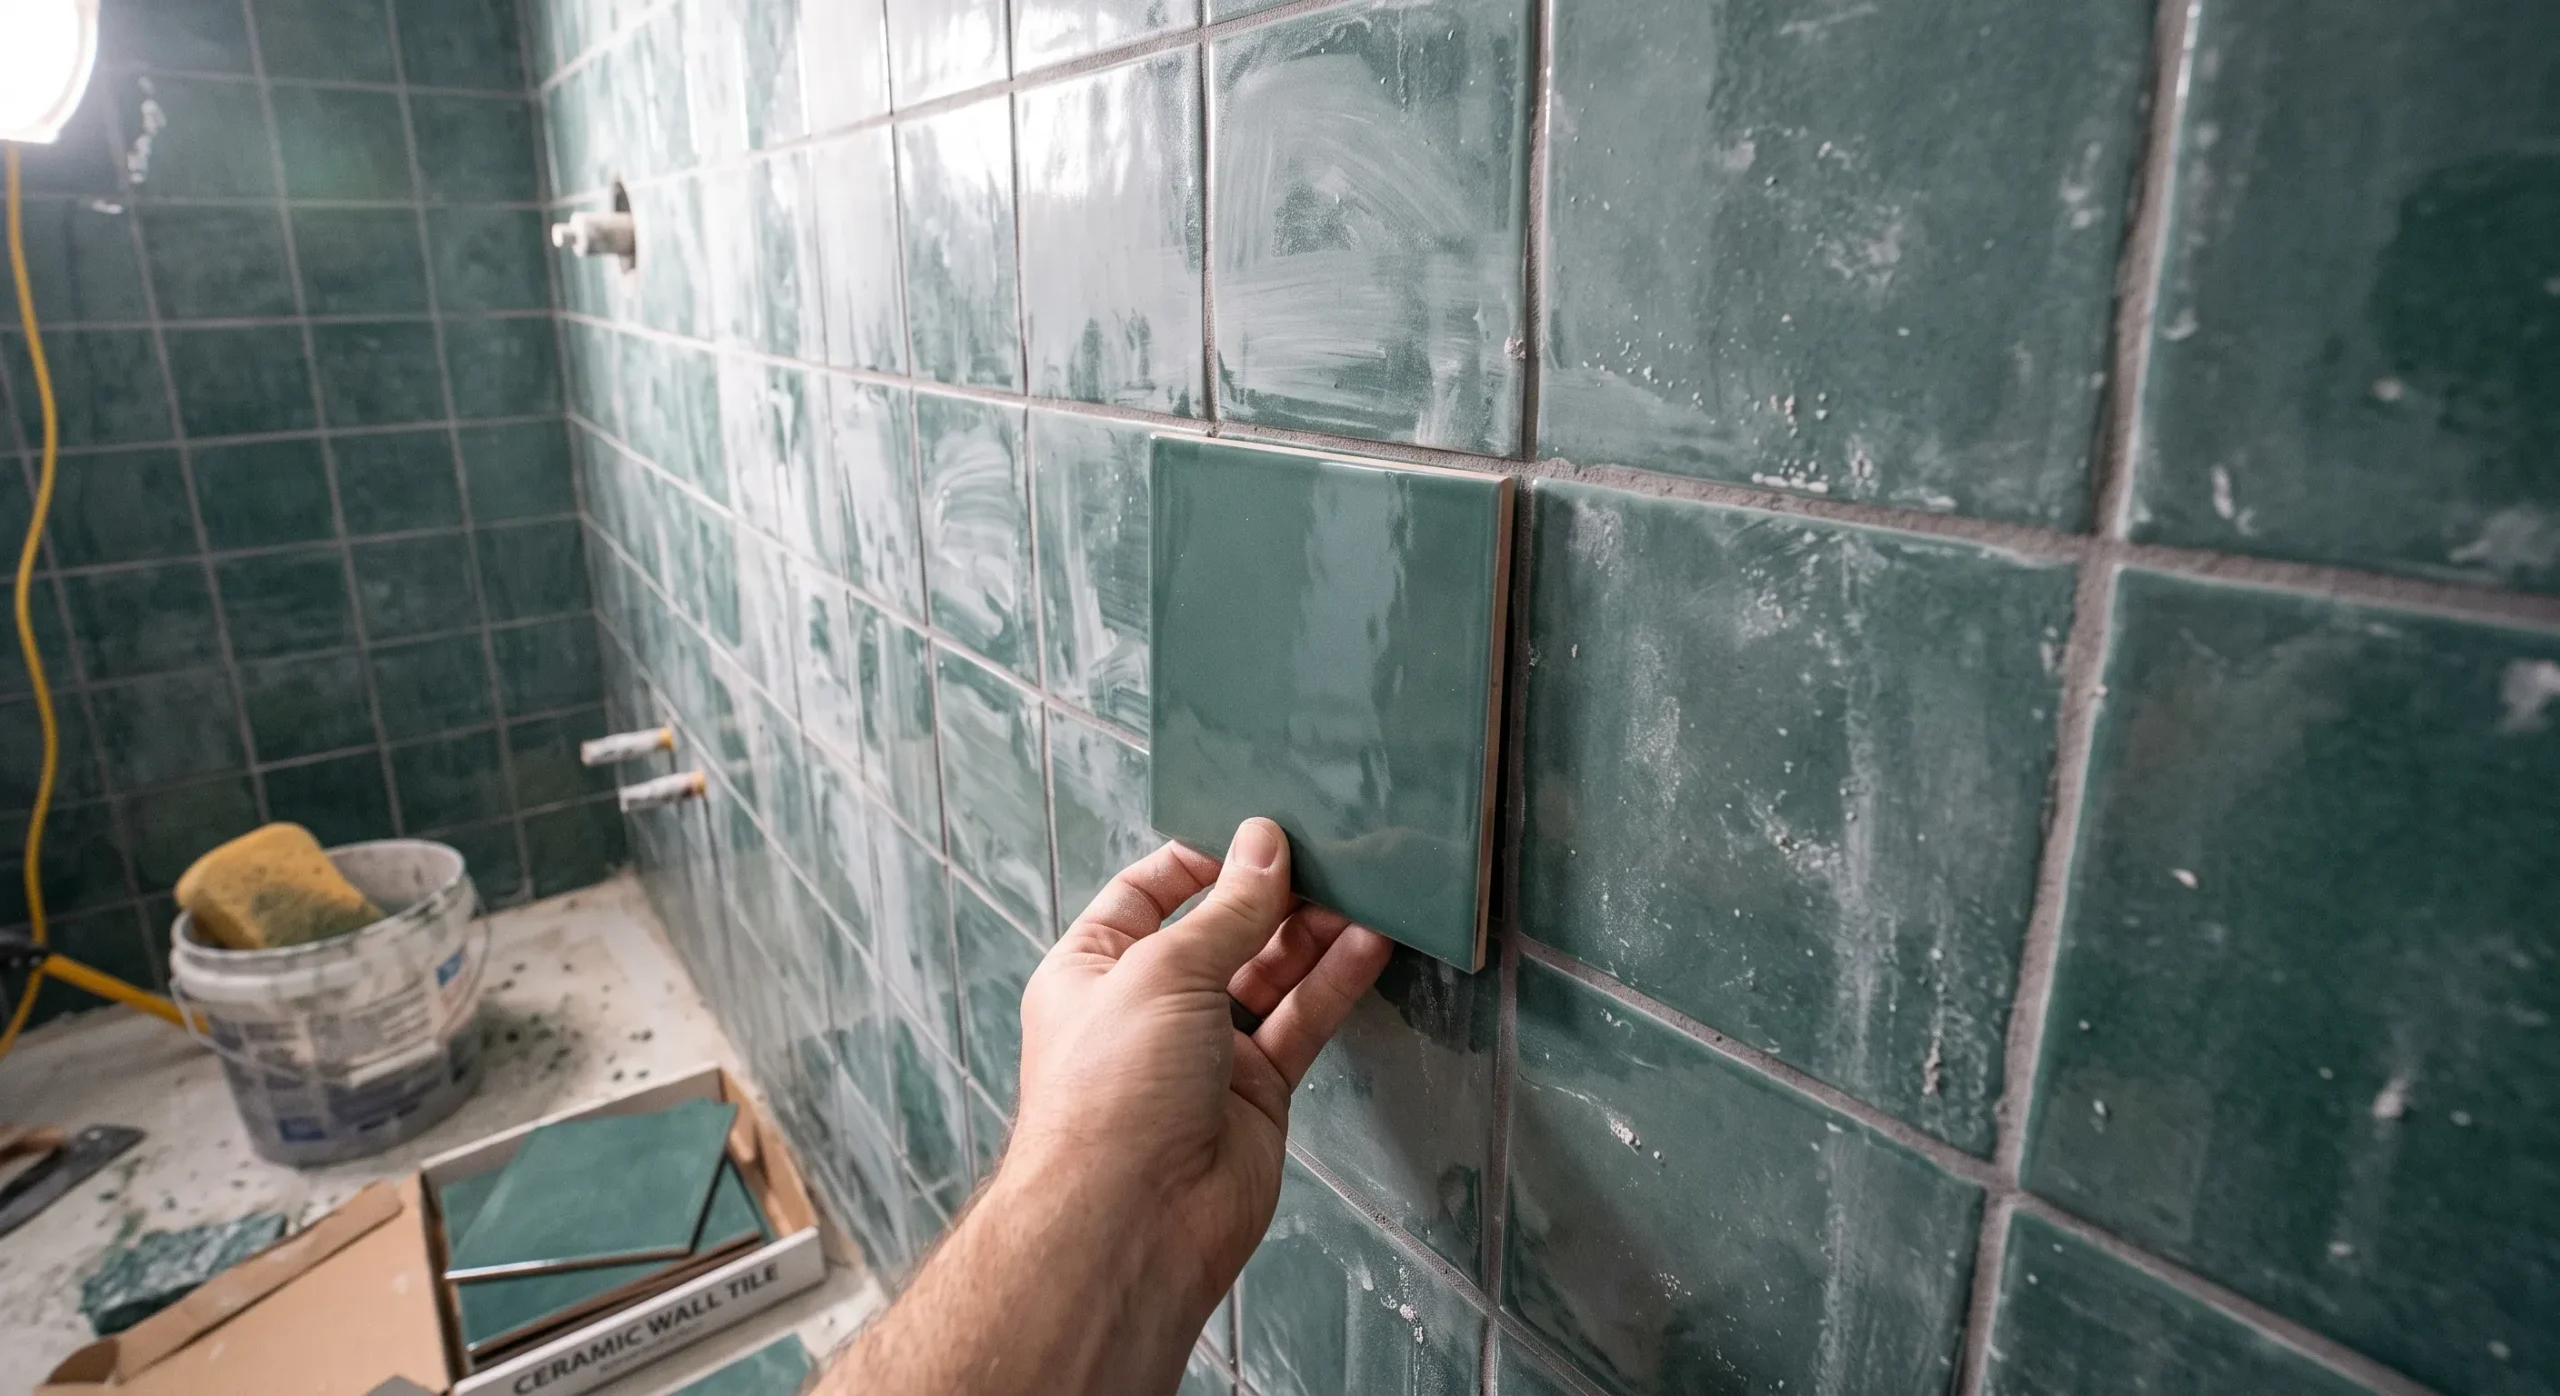
The comparison test is the one to actually do. Homeowners on Reddit arrive at it independently, over and over, because it works: hold a leftover tile from the box next to the installed wall. If the wall looks veiled and the loose tile looks crisp, you have haze.
One more thing worth knowing before you panic. Sometimes the tile is not hazed at all. Grout colour sitting in the joints changes how you read the whole wall, and a matte or textured tile does look duller installed than it did in the box under showroom lighting. That is not a defect and no amount of scrubbing will change it.

How to get grout haze off without wrecking new tile
Work up from the mildest option. Most haze on a fresh installation comes off with something far gentler than the internet suggests, and every step you skip upward is a step you cannot undo.
Step 1, after about three hours: dry or barely damp
Custom Building Products’ data sheet for Prism grout states that haze can be removed after three hours with cheesecloth or a wrung-out sponge. Not a wet sponge. Check the sheet for the grout you actually have, because these figures are product-specific. Custom is emphatic about the water because excess water at cleanup weakens the grout and pulls colour out of the joints. Their own instruction is to use as little water as possible and to mist the installation periodically with clean cool water for 72 hours, which is about curing the grout properly rather than cleaning it.
There is a specific reason too much water this early causes a problem, and the Tile Council of North America spells out the mechanism. Most modern grout is polymer-modified. TCNA describes a less common cousin of efflorescence: if the grout gets excessive moisture before those polymers coalesce, the polymer migrates to the surface, and when the water evaporates you are left looking at a white film. In other words, over-enthusiastic early cleaning can manufacture the exact haze you were trying to remove.
Step 2, after 24 hours: a non-acid haze remover
If a film survives, the same Prism data sheet allows cleaning after 24 hours with a non-acid product such as Aqua Mix Grout Haze Clean-Up, which can be used at full strength within the first 10 days after grouting. Non-acid means it will not attack fresh grout or acid-sensitive tile, which is exactly what you want this early.
Read the label anyway. Aqua Mix Grout Haze Clean-Up is marketed as a non-acidic formula and still carries an instruction not to use it on polished marble or any other acid-sensitive tile or stone. Non-acidic is not a synonym for harmless.
Step 3, after 10 days and not a day sooner: an acidic remover
This is the step people rush, and rushing it is how new grout gets discoloured. Two of Custom’s acidic products carry the same instruction on the label: concrete and grout should be cured a minimum of 10 days. MAPEI puts the same threshold the other way round, describing acid-based cleaners as ideal for removing cement grout haze after 10 days from installation.
Some grouts rule acid out entirely. Custom’s own installation guide for Prism grout says that if there is any grout haze, do not use acids on grout, and points you to the non-cement remover instead. LATICRETE is just as blunt on PERMACOLOR Select: do not use acid to clean coloured grout joints. If either of those went into your shower, the acid step does not exist for you at all.
The acid is not the acid you think it is
Half the advice online says grout haze remover is sulfamic acid. That is true of one product and wrong about the rest, and it matters because their labels differ.
| Product | Active chemistry | Stated limitation |
|---|---|---|
| TileLab Grout Haze Remover | Glycolic acid, pH 2 to 3 | Do not use on marble or polished stone |
| TileLab Sulfamic Acid Cleaner | Sulfamic acid, pH 2 to 3 | Do not use on marble or other polished stone |
| Aqua Mix Cement Grout Haze Remover | Urea monohydrochloride | Not for marble, limestone, travertine, some basalts |
| Aqua Mix Grout Haze Clean-Up | Non-acidic formula, contains EDTA acid with phosphate and citrate chelants | Not on polished marble or acid-sensitive stone |
| LATICRETE STONETECH Restore | Acid-based, pH 1.4 at light-duty dilution | Will etch or damage most marble, limestone and travertine |
Haze does not have an expiry date
You will read that grout haze becomes permanent after 10 days, or two weeks, or a month. We went looking for a manufacturer who says that and could not find one. Not Custom, not LATICRETE, not MAPEI. The 10-day mark in their documents is a minimum cure before acid is safe, which is close to the opposite of a deadline.
Cement haze does get harder to remove as it sits, and nobody is suggesting you leave it for a year. But if you are three weeks past install and reading that you have missed your chance, you have not. Take the slow route and it comes off.
Epoxy grout is the genuine exception. It is a different chemistry with a much tighter window. Custom directs you to a stripper rather than a cleaner for any epoxy haze cured more than seven days, and MAPEI wants its epoxy haze remover used within the first 24 hours for best results. If your installer used epoxy grout, deal with haze immediately.
One question worth answering before you scrub anything
Whose job is this? In our experience, on most contracts removing grout haze is part of the tile installation rather than a homeowner chore. Before you spend a Saturday on it, call the installer. If you are still choosing a contractor, this is exactly the sort of thing to pin down in writing first.
See how we handle bathroom remodelsWhat a shower remodel costs
If there is natural stone in your shower, stop here
This is the most important warning on this page, and it is the one nobody puts in a grout haze article, because grout haze articles are written about kitchen floors.
The standard fix for stubborn grout haze is an acidic remover. Marble, limestone and travertine are calcium carbonate. Acid dissolves calcium carbonate. That is the entire mechanism by which an acidic cleaner removes cement haze, and it does not stop politely at the edge of the grout line.
Custom Building Products states it directly on the label of their cement grout haze remover: acids of all kinds may etch, lighten, or change the colour of cementitious material, metallic glazes and some natural stones such as marble, limestone, travertine and some basalts. LATICRETE says their acidic cleaner will etch or damage most marble, limestone and travertine surfaces, and will etch or corrode most metal surfaces.
Etching is not a stain. It is a physical change to the surface, a dulled patch where the polish used to be, and it does not clean off. Restoration specialists writing for the Natural Stone Institute’s consumer site say the only fix for an etched stone is to have it honed and restored. They also note that acids break down sealers, so a stone shower that gets acid-washed needs resealing sooner as well.
If your shower has marble, limestone or travertine
- No acidic haze remover, ever. Not diluted, not “just on the porcelain bits.”
- No vinegar. It is an acid, and stone restoration specialists writing for the Natural Stone Institute’s consumer site put it bluntly: vinegar and bleach “will etch or burn the surface of your stone.” The Tile Council of North America makes the same point about the grout itself, noting that cement is alkaline and is dissolved by acids, so “as baking soda and vinegar react, so do grout and vinegar.”
- pH-neutral cleaners only, on the stone and near it.
- No scrubbing pads. They act like abrasives on stone.
- Non-acid haze removers still need a label check. Some exclude polished marble.
- If haze on stone will not budge with the gentle route, call a stone restoration specialist rather than escalating the chemical.
Check your niche and your shelves too. Plenty of showers are porcelain everywhere except a marble threshold, a stone shelf or a mosaic band. One acidic wipe-down of the whole wall reaches all of it.
If you are not sure what your shower floor actually is, our guide to shower floor materials covers how each one behaves in use, and choosing tile for your bathroom goes into the trade-offs before you buy.
Silicone smears on new glass
Search for how to remove silicone from shower glass and you will find a dozen thorough articles, all of them written about a completely different situation than yours. They are about stripping years-old failed caulk during a re-seal. You have a fresh smear from an installer’s thumb three days ago, on glass that cost real money, and the advice does not transfer cleanly.
Nothing dissolves silicone. That is not an opinion
GE puts it in their own technical data sheet, flatly: there is no substance that will dissolve silicone. Every forum post recommending you soak a smear in solvent until it melts away is describing something that does not happen. What solvents do is soften residue and lift the last oily film after the bulk has come off mechanically. That is the correct job for them and it is a small job.
GE’s instruction for uncured excess is to clean it from glass, metal and plastic while it is still uncured. So if the crew is still on site and you can see smears, say something that day. Wet silicone wipes off. Cured silicone is a project.
The trap: the solvent that clears the glass attacks the joint
Here is the connection almost nobody makes. Delta Shower Doors publishes a do-not-use list for shower glass, and three of the six entries are the exact solvents most commonly recommended online for silicone removal.
| Chemical | Delta’s stated reason |
|---|---|
| Naphtha | Can dissolve silicone and could lead to leakage over time |
| Acetone | Dissolves silicone, may damage seals or cause leakage |
| Ethyl acetate | Damages water-repellent coatings, dissolves silicone |
| Toluene | Can dissolve or degrade protective coatings on glass, and can dissolve silicone, leading to leakage over time |
| Hydrogen peroxide | Can corrode metal, even at low concentrations |
| Lye, sodium hydroxide | Extremely caustic and can etch or corrode glass surface, leaving permanent damage |
Read that list next to the problem you are solving. Four of the six entries carry a dissolves-silicone warning, and the smear on the face of your glass and the bead sealing the joint six inches away are the same material. A solvent aggressive enough to attack one is aggressive enough to attack the other, and the one in the joint is the one keeping water out of your wall. Delta’s warning about naphtha spells out the consequence: leakage over time.
GE’s consumer guidance points the same direction from the sealant side, listing full-strength bleach, ammonia and acetone among the things to keep off sealed surfaces.
The razor blade question, and the caveat nobody includes
GE’s own method for cured silicone on glass is a razor blade held in a holder, then mineral spirits, then a wipe with something that will not mark the surface. That is sound advice for plain, uncoated glass.
Every article we read repeated the razor advice. Not one carried the caveat that follows, which comes from the glass industry itself. The National Glass Association’s technical paper on cleaning architectural glass states that razor blades should never be used on coated glass surfaces, and that razor blades should be the last possible option, especially on heat-treated glass.
Your shower door is tempered, which is heat-treated. And coated shower glass is now common enough that guessing is a bad idea. If your glass is ShowerGuard, or was treated with EnduroShield or Diamon-Fusion, a blade takes the coating off along with the silicone and you will not see it until the glass starts spotting differently in that patch.
Removing a cured smear, safest order
- Find out if the glass is coated first. Ask the installer. This one answer changes everything below it.
- Fingernail or a plastic scraper. Fresh silicone on smooth glass often peels in one piece if you can lift an edge.
- Warm soapy water and patience. Softens the edge and gives you something to lift.
- Coated glass stops here. No blade, no solvent. Call whoever supplied the glass and ask what their coating tolerates.
- Uncoated glass only: a new blade in a holder. NGA’s technique matters, one direction only, never back and forth, because a back-and-forth stroke traps particles under the blade and drags them across the glass.
- Mineral spirits on the residue, not the joint. On a cloth, not sprayed. Keep it off the silicone bead and the seals.
- Rinse and dry. Then look at it in raking light before deciding you are done.
And the honest option most people skip: this is the installer’s mess. A smear discovered in the first week is a callback, not a DIY project. Nobody minds being asked, and they have the right tools.
Protective film and construction dust
Two things are on your new glass that were not there when it left the factory, and the way you handle them in week one determines whether the glass stays scratch-free.
Dry before wet. Always
Construction dust is not dust in the household sense. It is ground tile, cut stone, silica, thinset and grout powder. It is mineral, angular, and harder than most things in your bathroom. Spraying cleaner onto a dusty glass panel and wiping turns that grit into a slurry, and a microfibre cloth then presses it across the surface under pressure. That is a sanding operation.
Vacuum first with a brush attachment, glass and tracks and the floor. Then a dry microfibre, folded and turned often. Only then does anything wet come out. It is the same principle as the track-vacuuming rule in our glass shower door cleaning guide, and it matters more on new glass because you are setting a baseline you have to live with.
The glass industry says the same thing from the professional side. The National Glass Association notes that a large percentage of damaged glass results from non-glass trades working near glass, and its list of things not to do includes allowing splashed materials to dry on the glass surface.
Day one is not the day for your final clean
Fine dust keeps falling long after the visible mess is gone. Homeowners who have lived through heavy renovation describe the bulk of it settling over about a week, with trace amounts still landing for a couple of weeks after that, and expecting to clean at least twice. Which is why the polish you do on handover day is not the real one. Do a dry knock-down now, live with it, and do the proper clean around day three to seven.
This matters more than it sounds, because it also sets the timing for the coating in the next section. Sealing a coating over a film of settled construction dust locks the dust in permanently.
Protective film: take it off, and go by the maker’s instructions
New glass, hardware and fixtures often arrive with a peel-off film. It should come off, and it should come off within the window the film’s manufacturer specifies.
We looked for a hard number and there is not one to give you honestly. We checked the installation manuals from several major shower door brands and none of them mentions protective film at all. What the glass industry does say is worth knowing anyway: failure to remove temporary protective films by the manufacturer’s recommended date may result in aggressive methods being required to remove the film. In other words there is a date, it comes from whoever made the film, and missing it turns a peel into a scrape.
Practically: peel it once the messy trades are finished and before the shower goes into service. Keep it on while other work is still happening in the room, because that is what it is for. Peel slowly at a shallow angle. If it tears into confetti or leaves adhesive behind, stop and ask the supplier what their film responds to rather than experimenting with solvents on new glass.

The coating window
Right now your glass has a property it will never have again. Nothing has dried on it. No minerals, no soap, no shampoo film, no cleaning product residue. If you are ever going to put a protective coating on this glass, the days between the final construction clean and the first shower are the best days you will get.
The reason is simple and it is why the timing matters so much. A coating bonds to what it is applied to. Apply it to clean glass and it bonds to glass. Apply it over a haze of dried minerals and construction dust and it bonds to that, sealing the contamination underneath where no cleaner can reach it. You do not get a second attempt without stripping the coating off.
Factory-treated, aftermarket, or bare
Before you buy anything, find out what you already have. There are three possibilities and homeowners routinely do not know which one they own.
Quite a lot of people are in the first category without realising it. Kohler applies a factory treatment called CleanCoat to all of its bath and shower doors, and to Sterling frameless doors, and their description of what it does is exactly the mechanism we are talking about: treated glass repels water and dirt so it runs off in droplets instead of calcifying in place. If your door came from Kohler, you have coated glass whether anyone mentioned it or not. Kohler’s instruction that follows from that is short and worth obeying: do not use abrasive cleaners on glass treated with CleanCoat.
| What you have | How it got there | What you should do |
|---|---|---|
| Factory-treated glass | Applied at the glass plant before tempering, ordered as part of the glass | Nothing. Follow the maker’s cleaning rules and do not add anything on top without asking them |
| Aftermarket coating | Wiped or sprayed on, by a pro or by you, after the glass exists | If you want one, now is the window. Follow the prep instructions exactly |
| Bare glass | The default unless someone specified otherwise | Decide now. Coating, squeegee habit, or both |
If your glass is factory-treated, Guardian’s position on ShowerGuard is worth knowing before you buy a bottle of anything. Guardian says aftermarket coatings are not necessary or recommended for ShowerGuard and are used at your own risk. It adds that such products may not damage the surface or void the warranty, but that Guardian cannot guarantee their performance. That is softer than people assume, and it is still a clear “you do not need this.”
If you are applying an aftermarket coating yourself
EnduroShield’s own DIY instructions are the clearest published example of what these products need, and a few of their points will surprise you.
New glass still needs cleaning. They say so explicitly, because the coating needs a surface free of small particles, and fresh-from-the-factory does not mean fresh-from-a-building-site. But they also say do not use steel wool on new glass, and to use a clean lint-free cloth instead. The steel wool that comes in their kit is for stripping years of scale off old glass. On new glass it is a scratch risk with no upside.
The glass has to be clean and dry, because water interferes with bonding during application. And there is a temperature window, between 50 and 86 degrees Fahrenheit, which is a real consideration if your remodel finished in January and the bathroom is cold.
On timing after application, read the instruction precisely. EnduroShield says to allow the glass to cure for eight hours before it comes into contact with chemicals such as cleaners, soaps and shampoos. That is a chemicals threshold, not a water one, and they note separately that rain immediately after application does not affect exterior glass. Since showering involves soap, eight hours before the first shower is the practical reading.
Not every coating works this way, which is another reason to read the one in your hand. Diamon-Fusion publishes no cure time at all and says the glass can be handled immediately after application. Two reputable products, two different answers, and no general rule you can safely apply to both.
Clare’s tip
If you think you might want treated glass, say so while the glass is still being ordered, not after it is hanging on your wall. Factory treatment is applied at the plant and it is a line item on the quote. Customers who ask about it after installation are always surprised the answer is no longer available at that price.
What a coating will and will not do
A coating makes the surface repel water so droplets sheet off instead of clinging and drying. Less water left standing means fewer minerals deposited. That is the mechanism and it is a good one.
What it is not is permission to stop caring. Coatings are thin, they wear, and the wrong cleaners take them off faster. EnduroShield warns that their coating can be affected by cleaning products containing strong alkalis and by mould removers combining bleach and sodium hydroxide, and that even a poor quality squeegee blade can be abrasive to the coating. Their own maintenance instruction is to clean shower glass weekly with a mild detergent and a damp microfibre.
On lifespan, be careful what you believe. EnduroShield’s headline ten years is a warranty term that applies to professional application to new glass. Professional application to existing glass carries five years, and a DIY kit carries three, regardless of how new your glass is. Those are warranty tiers, not a service life, and how long a coating actually lasts in your bathroom depends on your water and your cleaning habits.
For what happens once a coating does wear through, and how to tell a worn coating from actual etched glass, that is the territory of our companion guide to cleaning glass shower doors. This article is about staying out of that situation.
Building the habit before you have a problem
Everything above is a one-time job. This part is the whole rest of the shower’s life, and it is worth more than any product on this page.
Hard water does not stain glass. Evaporation does. Water sitting on a vertical surface leaves the minerals behind when it dries, and those minerals are what eventually turn into the cloudy film nobody can clean off. Remove the water before it evaporates and the whole failure mode never starts. That is a 30-second job with a squeegee.
This is not folk wisdom from cleaning forums. Kohler puts it in the homeowner guide that ships with their shower doors: use a shower squeegee to clean the glass doors after showering. Sterling, a Kohler company, is more explicit about why, telling owners in hard water areas to wipe the door dry after each use, just as you would towel dry your hands.
The reason to start on day one rather than when you notice a problem is that you are forming a habit against zero resistance. Nothing looks bad yet, so it feels pointless, which is exactly the moment it is easiest to make automatic. Ninety days in, nobody is deciding to squeegee. They just do it.
The 90-day routine, in full
- Every shower. Squeegee the glass top to bottom. Wipe the bottom rail and the seal with the towel you are already holding.
- Every shower. Leave the door open afterwards. Airflow finishes what the squeegee started.
- Run the fan. During, and for 20 minutes after. Steam that condenses somewhere else is still your problem.
- Weekly. Mild detergent and a damp microfibre on the glass, which is exactly what the coating makers ask for anyway.
- Monthly. Vacuum the track. Check the bottom seal. Lift out the drain grate if you have a linear drain and clean the housing underneath. That corner is where the trouble starts and it is the part everybody skips.
- Never. Abrasive pads, melamine foam sponges, powdered cleansers, or anything you have not checked against the glass maker’s list.
The metal bits nobody mentions: profiles and drains
If your shower has metal edge trim around the tile, or a linear drain, those have their own care rules and they are stricter than the tile’s. Schlüter, whose profiles and linear drains turn up in a lot of tiled showers, asks for neutral cleaning agents on its edge profiles and a mild household cleaner on its drains. On the profiles it rules out two whole categories at once. Avoid strong acids such as hydrochloric or hydrofluoric, and avoid base or alkaline cleaners, which it names as bleach, ammonia and chlorides. No abrasive cleaning agents or tools either, on profiles or drains.
That is an awkward pair of restrictions, because between them they rule out most of the bathroom aisle. The descaler is acidic. The mould spray is bleach. The all-purpose cleaner is often ammonia. A mild detergent in warm water is roughly what is left.
On anodized aluminium and colour-coated aluminium profiles, Schlüter is specific that abrasive cleaners are out. And if you have a linear drain, the grate lifts out. Schlüter says so directly, and taking it out to clean the housing underneath every month or two is the difference between a drain that smells fine in year three and one that does not.
Two practical notes. Buy a squeegee with a good soft rubber blade and hang it inside the shower where it is easier to use than to skip. And replace the blade when it stops leaving the glass clean in one pass, because a hardened blade drags rather than wipes.
The honest version of this advice is that it only works if everyone does it. A shower shared by four people where one person squeegees is a shower that spots. Have the conversation in week one, while the glass is still visibly perfect and the point is easy to make.

What a proper handover looks like
Everything in this guide exists because of a gap. The work finishes, the van leaves, and the person who now owns a shower knows nothing about the products in it. We would rather not be the company that does that, so here is what the end of one of our bathroom projects actually involves.
How we close out a bathroom
- A final clean before we hand it over. Not a broom-swept site. The room is cleaned properly, which means the grout haze and the construction dust in this guide are our job, not yours.
- A documented walkthrough and a written punch list. We walk the finished room with you and write down anything outstanding. Final payment is held until every item on that list is signed off.
- Care instructions, at handover, in your hand. Which grout went in. Which sealant. Whether the glass is coated. What not to clean any of it with. The whole last section of this guide is a list of questions you should not have to ask us, because we should have told you.
- A follow-up. We come back. Things surface in the first weeks that nobody can see on day one, and a joint that needs attention at week three is a five-minute fix rather than an argument in year two.
Here is one of those projects, walked by the designer who drew it. Gina works out of our Chantilly showroom, and this is a bathroom she designed in Leesburg.
Watch what she describes, because it is a list of everything this article has been warning you about. The clients came in unhappy with a cramped shower boxed in between two walls, a tub on a podium that was awkward to climb into, and two separate vanities. So the shower moved across the room to face the windows and became curbless and walk-in, with a single glass panel. Big-format white tile with black veining on the walls. A terrazzo-style floor chosen for grip and for durability, over heat. A freestanding tub. One long vanity with a waterfall end.
Now count the maintenance decisions hiding in that room. One large uninterrupted glass panel is a beautiful thing and it is also the single biggest surface in the house for hard water to dry on, which is the squeegee conversation. A curbless entry means the floor drains rather than the water being contained by a curb, so the drain and its grate matter more than usual. And white tile with black veining is the exact case where you have to ask what the material actually is, because natural marble and a porcelain look-alike are hard to tell apart across a finished room and they take completely different cleaners. One of them is destroyed by the standard grout haze remover.
None of that is a criticism of the design. It is the point of the article. That room is perfect on the day it is filmed, and whether it still looks like that in five years is decided by a handful of small things done in the weeks right after the camera stops.

What to ask your installer before they leave
Read enough homeowner threads and a pattern shows up that is hard to unsee. Almost nobody is told anything. One homeowner we came across knew only that the installer had put “some stuff” on the glass and said never to use ammonia on it. That was the most informed person in the thread.
Everything in this guide depends on facts only your installer has. Which grout. Which sealant. Whether the glass is coated. If they hand you all of that unprompted, as we think they should, this list is just a check. If they do not, print it or screenshot it and get the answers before the van pulls away. Every one of these has ruined somebody’s week.
| Ask this | Because |
|---|---|
| Which day can I take the first shower, and is that limited by the grout, the sealant or the glass? | The binding constraint is usually the sealant, and the products vary from 30 minutes to 24 hours |
| Which grout and which sealant did you use? Can I have the names? | Every timing in this guide is product-specific, and some grouts rule out acid entirely |
| Is my glass coated, and if so, factory or aftermarket? | Decides whether a razor blade or a given cleaner is safe, and whether you need to buy anything |
| Does the grout need sealing, and are you doing it or am I? | Some grouts need no sealer at all. Assuming wrong goes both ways |
| Is there grout haze, and is removing it part of the job? | In our experience it is usually the tile installer’s work, not yours |
| Are all the changes of plane silicone rather than grout? | Grout in a moving corner cracks, and cracked corners leak |
| What is the do-not-use list for these surfaces, in writing? | Many glass warranties are conditioned on approved cleaning products |
| Is there natural stone anywhere in here, including thresholds and shelves? | One acidic wipe-down of the whole wall reaches the stone too |
| When is the real final clean, and who does it? | Dust keeps landing for weeks, so handover day is not it |
| Do I have leftover tile and grout, and where did you put it? | Leftover tile is your haze comparison test and your future repair |
If a contractor is impatient with these questions, that tells you something too. The ones who do good work like being asked, because it is the difference between a shower that still looks right in five years and a callback about something that was never their fault.
What homeowners actually run into for Bathroom Cleaning
These are real posts from homeowners, quoted from their original threads and linked. Some are days into a new shower and some are years in. We went looking for what people get stuck on, and the same handful of moments came up again and again.
“I’ve spent hours trying to scrub the haze off with a microfiber towel, I’ve used vinegar, I’m scared to use harsh chemical cleaners because I hear it can damage to tile and I read some many posts where people say they don’t work. I’m at a loss of what to do. I’m freaking out. Help!!!”
This is the most common state to be in, and the vinegar is the tell. Vinegar is a mild acid, so on a fresh installation it is either too weak to shift cured haze or strong enough to be a problem for the grout and any stone nearby. Neither is the answer. The answer is the escalation ladder in the haze section: gentlest first, non-acid at 24 hours, acid only after 10 days and only if your grout allows it.
“You also shouldn’t use haze remover for like 2 weeks. I ruined my grout not paying attention to that (discolored it) …”
There it is, from someone who found out the expensive way, though they also mention elsewhere in the thread that they mixed the haze remover with other strong chemicals, which will not have helped. The label number is 10 days minimum cure before an acidic remover. Discoloured grout from going in early is not something you clean off afterwards.
“Our tile floors in the shower were installed a week ago and look very dull compared to the uninstalled floor tiles. Is this normal? The shower has not been used yet.”
A hundred-plus people replied to that thread and never agreed on an answer. Haze, grout colour reading differently against the tile, or unsealed stone taking up pigment, and from a photograph you often cannot tell. Which is the honest reason to start gentle. The mildest approach is also the one that costs you nothing if you have diagnosed it wrong.
“oh i didn’t know about the coating thing, was that through the glass company or someone they brought in separately”
u/swhill1, r/BathroomRemodeling
Someone learning that coated glass exists from a stranger on the internet, while still deciding whether to buy glass at all. She had already spoken to people who had it done. This happens constantly and it is a failure of the industry rather than the homeowner. Nobody should have to find out about a product option this way, and finding out after the glass is already hanging is worse.
“I got the coating on my first shower remodel and we had hard water. The user did not squeegee every use and 5 years later it now looks horrible and can not be cleaned. I denied the coating on my second bathroom remodel and we had installed a softener by then and the users squeegee religiously. It is spotless 3 years later. Take what you want from that.”
u/LuapYllier, r/HomeImprovement
Two showers, one household, opposite results, and the variable was not the coating. We would not go as far as saying skip the coating, because two data points is not a study. But it is a good corrective to the idea that a coating is a substitute for the habit. It is a head start, not a replacement.
“Our installer put some stuff on the glass when it was installed that seems to have helped a lot. He said we should never use cleaners containing ammonia on it.”
u/lutzlover, r/Remodel
“Some stuff.” This homeowner got more information than almost anyone else in the threads we read, and they still cannot name the product on their own glass. In three years, when it wears and they want it redone, they will not know what to ask for. That is the gap the last section is designed to close.
“I can 100 percent assure you that the dust gets absolutely everywhere. All you can do is reduce it, you can never eliminate it. The bulk of it will settle out in a week, but trace amounts will keep settling out for 2 more weeks. You end up cleaning at least twice.”
u/RL203, r/HomeImprovement
You end up cleaning at least twice, and that is the schedule to plan for rather than fight. Knock the dust down dry on day one, do the proper clean once it has stopped falling, and put the coating on after that second clean rather than the first.
“But you have to train everyone in the family to do it or it’s a fools errand.”
u/legitimatehotslide, r/Remodel
The most useful sentence in any of these threads. Whether glass shower doors are a joy or a chore comes down to household compliance more than product choice, and week one is when that conversation is easiest to have.
Planning a bathroom or shower remodel?
We have been fitting kitchens and baths since 2011, across 14 showrooms in Virginia, Maryland, North Carolina, Texas, New Jersey, Florida and Tennessee. Come and look at glass, tile and grout options in person, and get the coating decision made before anything is ordered rather than after.
How to Clean and Protect a New Shower After a Remodel Frequently Asked Questions
How long before I can use the shower after grouting?
Twenty-four to 48 hours. MAPEI answers this directly for its Keracolor cement grouts: restrict use for 24 to 48 hours after grouting in residential showers and tub surrounds, and 14 days if it is a steam shower. The silicone runs on a similar clock. GE and DAP both give a 24-hour full cure and say not to touch or clean the sealant during it, and DreamLine and Kohler both instruct owners to allow 24 hours before first use. Work from 48 hours and you clear both. Ask your installer which grout and sealant went in, because premixed grout wants 72 hours before any moisture, and epoxy grout and steam showers want considerably longer.
How long does shower silicone take to cure?
Full cure is 24 hours for most 100% silicone kitchen and bath sealants, including GE Advanced Silicone 2, GE Supreme and Gorilla. Tack-free is much sooner, 30 minutes for both GE products, though it varies widely between products and Gorilla does not publish a figure at all. Water contact is a separate number again: GE allows 30 minutes if the bead is no thicker than 3/16 inch and the room is at least 65 degrees Fahrenheit with at least 50% humidity, and 8 hours if those conditions are not met. DAP’s flagship 100% Silicone Rubber Kitchen, Bath and Plumbing asks for 12 hours before water regardless. Silicone cures by pulling moisture from the air, so a cold dry bathroom slows it down.
Can you remove grout haze after 10 days?
Yes. The 10-day figure is widely misreported as a deadline, and it is the opposite. Custom Building Products’ acidic cleaners state that concrete and grout should be cured a minimum of 10 days before use, and MAPEI describes acid-based cleaners as ideal for removing cement grout haze after 10 days from installation. No manufacturer we could find publishes a point after which cement grout haze becomes unremovable. It does get harder with time, so do not leave it indefinitely, but at three weeks you have not missed your chance. Epoxy grout is the exception, with a much tighter window. MAPEI wants its epoxy haze remover used within the first 24 hours, and Custom treats epoxy haze cured past seven days as a stripper job.
How long does grout need to cure before cleaning?
Longer than you can use it. MAPEI puts full cure for its Keracolor cement grouts at 21 days and states that grout must be fully cured for 21 days before regular cleaning. You can be showering long before that, at 24 to 48 hours, so the two permissions get confused constantly. Light haze removal is a different job again and happens much earlier, from about three hours with a wrung-out sponge. The rule of thumb: use it at two days, treat it gently, and hold off on any real cleaning routine until roughly three weeks.
Should I seal the grout in a new shower?
It depends on which grout went in, which is why it is on the question list for your installer. Cement grouts are porous and generally benefit from sealing. Epoxy grouts do not need it and are described by MAPEI as so impervious that they will not even accept a sealer. Some cement grouts also arrive with sealer technology built in and are sold as never needing sealing, LATICRETE’s PERMACOLOR Select among them. If yours does need it, timing matters: Custom Building Products advises waiting 48 to 72 hours after installation so residual moisture does not dilute the sealer, and MAPEI’s general guidance is 24 to 72 hours depending on the grout, with a minimum of 48 hours for its Keracolor cement grouts. Then keep the area dry for another 12 to 24 hours while the sealer cures.
How do you remove grout haze from new tile?
Start with the gentlest method and escalate only if you have to. From about three hours, cheesecloth or a wrung-out sponge lifts most fresh haze, using as little water as possible. After 24 hours a non-acid haze remover is the next step. An acidic remover is a last resort and carries a hard condition: two Custom Building Products acidic cleaners require grout cured a minimum of 10 days, and MAPEI describes acid-based cleaners as suited to cement haze after 10 days from installation. Never use an acidic remover if there is marble, limestone or travertine anywhere in the shower, and check your grout first, because Custom’s Prism and LATICRETE’s PERMACOLOR Select both rule out acid on the grout entirely.
Should you remove grout haze before sealing?
Yes, always. A sealer is designed to soak in and bond, so anything sitting on the surface when you seal gets locked underneath it. Removing haze afterwards then means stripping the sealer first. The timing works out naturally: haze comes off from about three hours with a wrung-out sponge, or after 24 hours with a non-acid remover, while sealers generally want 48 to 72 hours after grouting so residual moisture does not dilute them.
Can I use vinegar on a new shower?
Not in the first days, and never if there is natural stone in the shower. Vinegar is an acid, and acids attack fresh cement grout as well as haze. The Tile Council of North America puts the chemistry plainly: cement is alkaline based and is dissolved by acids, so as baking soda and vinegar react, so do grout and vinegar. Their recommendation is to clean grout with an alkaline cleaner rather than an acidic one. Stone restoration specialists writing for the Natural Stone Institute’s consumer site say vinegar and bleach will etch or burn the surface of your stone, and that acids break down sealers so the stone needs resealing sooner. On plain porcelain or ceramic with fully cured grout, diluted vinegar is a common approach to mineral deposits, but on a brand-new shower it is the wrong tool at the wrong moment.
How do I remove silicone from glass without scratching it?
Find out whether the glass is coated first, because that answer changes the method entirely. On coated glass, no blade and no solvent: contact whoever supplied it. On uncoated glass, start with a fingernail or plastic scraper and warm soapy water, since fresh silicone often peels off in one piece. If a blade is needed, GE specifies a razor held in a holder followed by mineral spirits on a cloth. Use the glass industry’s technique: a new blade, one direction only, never back and forth, because a back-and-forth stroke traps particles under the edge and drags them across the glass.
What dissolves silicone on glass?
Nothing does. GE states in its own technical data sheet that there is no substance that will dissolve silicone. Solvents soften residue and lift the last oily film after the bulk has been removed mechanically, which is a smaller job than most advice suggests. There is a further reason for caution in a shower. Delta Shower Doors lists naphtha, acetone and ethyl acetate among chemicals to keep off shower glass specifically because they attack silicone, and the bead sealing your joint is the same material as the smear on your glass.
Is a shower glass coating worth it?
It depends on your water and your habits, and it is worth most when applied to new glass before first use. A coating makes water sheet off rather than cling and dry, so fewer minerals are left behind. It does not remove the need to squeegee. Coatings are thin, they wear, and strong alkaline cleaners and some mould removers strip them faster. If you are ordering glass now, factory-applied treatment is a line item on the quote and generally the better route than buying a kit later. If your glass is already factory-treated, Guardian says aftermarket coatings are not necessary or recommended for ShowerGuard, and that it cannot guarantee their performance.
Can I use any cleaner on coated shower glass?
No, and this is where warranties get voided. EnduroShield warns that their coating can be affected by cleaning products containing strong alkalis and by mould removers combining bleach and sodium hydroxide, and recommends water with a mild detergent on a damp microfibre. They also name rough, gritty and abrasive cleaners as harmful, and note that even a poor quality squeegee blade can abrade the coating. Delta Shower Doors publishes a named do-not-use list and tells owners to contact them before using a cleaner they are unsure about. Get the do-not-use list from whoever supplied your glass and keep it, because many glass warranties are conditioned on approved cleaning products.
Why does my new shower tile look dull compared to the leftover tiles?
Most often grout haze, a thin cement film left from grout cleanup. Hold a leftover tile from the box against the installed wall, which is the fastest diagnostic there is. Two other explanations are worth ruling out before you reach for chemicals: grout colour in the joints changes how you read the whole surface, and unsealed stone or unglazed tile can take up pigment during grouting. If gentle cleaning makes no difference at all, it is probably not haze, and escalating the chemical will not help.
When should I remove the protective film from new shower glass?
Once the messy trades have finished and before the shower goes into service, following the film manufacturer’s instructions. There is no universal number of days. Shower door installation manuals do not generally address film at all, and the glass industry’s guidance defers to the film maker, warning only that failure to remove temporary protective films by the manufacturer’s recommended date may mean aggressive methods are needed to get it off. Peel slowly at a shallow angle. If it tears or leaves adhesive, ask the supplier rather than trying solvents on new glass.
How do you clean a shower after a remodel?
Dry before wet, and later than you think. Vacuum glass, tracks and floor with a brush attachment, then go over the glass with a dry microfibre. Construction dust is ground tile and grout, which is abrasive, so spraying and wiping a dusty panel grinds grit across it. Save the proper wet clean for around day three to seven, once most airborne dust has settled, and use warm water with a mild detergent rather than anything aggressive. Check the grout and sealant timings first, since some of them rule out cleaning products in the first 24 hours.
About the people behind this guide
Designer at our Columbia location. Clare specifies tile, glass and grout on bathroom projects, and hears what goes wrong in the first month after installation more often than anyone.
CEO of USA Cabinet Store. Emin has led the company since it began selling cabinets in 2011, and reviewed this guide for accuracy against how our own installation teams hand over a finished bathroom.
Reviewed by Emin Halac, CEO. Last updated August 2026.
Showrooms in Fairfax, Ashburn, Chantilly, Columbia, Annapolis, Cary, Houston, Cherry Hill, Orlando, Nashville,Tampa, Houston Oak, Virginia Beach and more in near future.